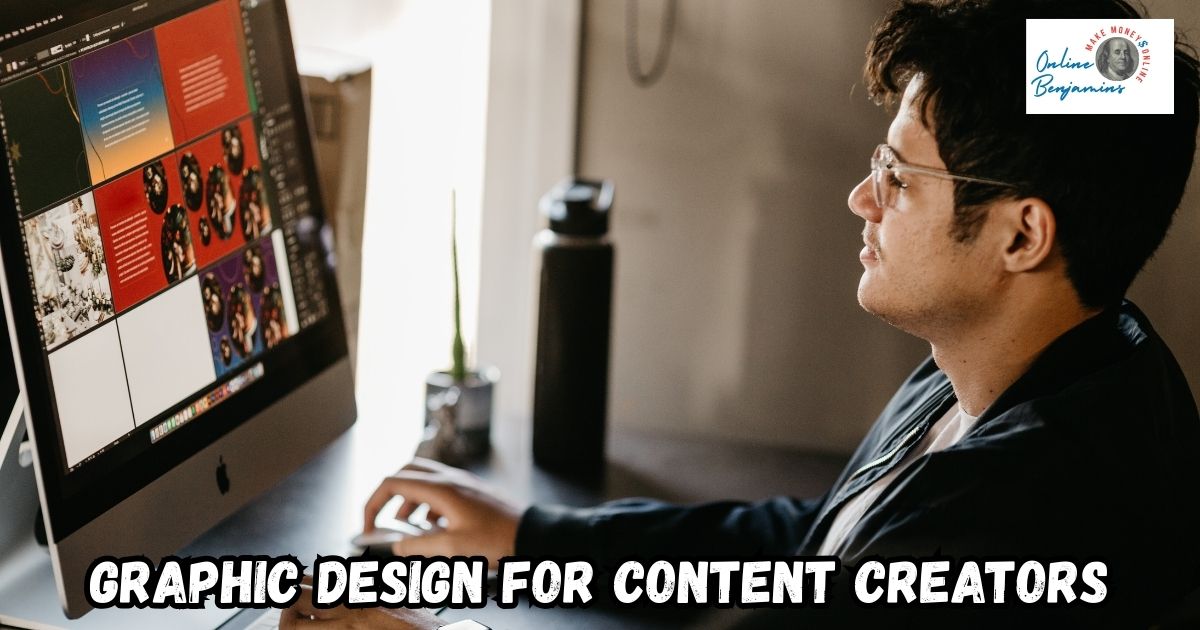
Through my experience, I’ve come to realize graphic design is about so much more than making things look good. It’s about communicating ideas in a flash, building a familiar online presence, and making content enjoyable for people to engage with.
QUICK LOOK: – Essential Tools for Professional Looking Graphic Design
- Canva: Its drag-and-drop style and vast template library make social posts, banners, and presentations a breeze. The built-in icons, illustrations, and stock images are especially handy.
- Adobe Express: For polished graphics or snappy video content, this tool packs in easy templates and even has a free plan that’s plenty for beginners.
- Piktochart: Ideal for visualizing data quickly. I use it to create fast infographics and visual walkthroughs without wrestling with complex settings.
- Adobe Photoshop: For the most creative freedom, Photoshop is still my top choice. It’s perfect for advanced edits and original designs if I want to dig in deeper.
- AI Generators (DALL-E, Midjourney): Want a totally unique image? These let me cook up something new with just a text prompt, delivering custom visuals for my posts.
- InVideo / Descript: When I need to turn scripts into video quickly, these tools use AI to help, saving me precious hours with short video content.
- Unsplash: I look here for professional-grade, free photos perfect for all my designs.
Creating eye-catching visuals is a major advantage for any content creator eager to stand out online. By sticking to some basic design rules, picking the best tools, and staying consistent, I can give my content a professional and inviting vibe.
Why Strong Visuals Matter in Content Creation
In today’s digital world, people scroll quickly and only stop when something really grabs their attention. Quality visuals help me stop them in their tracks, sometimes before they read a single word. When I share content featuring clean, bold images, it gets shared more, remembered longer, and simply stands out. Visuals also work wonders for storytelling; a single graphic or a thoughtfully designed post can communicate more than a paragraph ever could.
Over time, I’ve noticed sharp visuals can give authority to my message, no matter where I share—Instagram, blogs, or YouTube thumbnails all benefit. Good design brings a sense of order and makes posts inviting, which keeps people coming back for the next drop.
Key Graphic Design Principles Every Creator Should Know
Getting the basics down has helped me avoid confusing or packed visuals. Here are the principles I always keep in mind with new projects:
- Balance and Alignment: Arranging my elements so everything feels steady is crucial. Matching things up and using even spacing keeps designs crisp. I sometimes use grids, even for simple graphics, to nail this.
- Contrast and Emphasis: Making the standout parts pop—using color or bigger fonts—shows viewers where to look first. This is perfect when I’m making posts meant to get a single point across.
- Color Theory: Picking a few key colors that fit my vibe or message makes all the difference. Too many colors just get messy, so I stick with two to four for consistency and recognition.
- Typography: Consistent text helps a design feel professional. I choose a couple of easy-to-read fonts and use headlines in larger sizes to make the message clear.
- White Space: I’ve learned not to fill every little gap. Leaving some empty space gives my designs breathing room and boosts readability.
- Proportion and Scale: Making main details larger than the rest brings a natural flow and highlights what matters.
Getting comfortable with these simple principles can completely change the vibe and effectiveness of any visual content, from Instagram graphics to website banners.
Building an Effective Visual Content Strategy
Before jumping into any design software, I pause to think about my audience and the main goal of the post. Here’s what I focus on:
- Know Your Audience: Learning what grabs my followers’ attention helps me craft visuals they’ll care about. Do they like flashy shades or softer colors? Quick tips or in-depth info?
- Keep Your Brand Consistent: Using the same logo, colors, and fonts everywhere means people recognize my style right away, no matter where they see it.
- Tell a Story: Every graphic can tell a short story. I like adding a beginning, middle, and end—even for a single Instagram post or a basic infographic.
- Mix Up Visual Formats: I rotate between carousels, infographics, memes, and video clips. Keeping things fresh and fun helps maintain the audience’s attention.
- Use High-Quality Images: Blurry or stretched images just don’t cut it. High-res, clutter-free photos make everything look more polished.
- Customize for Each Platform: Every network wants a different image size. Instagram favors squares, YouTube and Facebook love wider images. I make sure to check each platform’s guide before hitting publish.
I also set aside time regularly to plan visuals in batches. Drafting multiple graphics together makes it easier to keep a unified look across my content, and I can tweak messaging as needed to match specific campaigns.
Essential Tools for Easy and Pro-Level Design
Back when I started, professional designs seemed impossible without pricey software and a lot of training. Thankfully, user-friendly online tools changed the game. Here are the staples I rely on most:
- Canva: Its drag-and-drop style and vast template library make social posts, banners, and presentations a breeze. The built-in icons, illustrations, and stock images are especially handy.
- Adobe Express: For polished graphics or snappy video content, this tool packs in easy templates and even has a free plan that’s plenty for beginners.
- Piktochart: Ideal for visualizing data quickly. I use it to create fast infographics and visual walkthroughs without wrestling with complex settings.
- Adobe Photoshop: For the most creative freedom, Photoshop is still my top choice. It’s perfect for advanced edits and original designs if I want to dig in deeper.
- AI Generators (DALL-E, Midjourney): Want a totally unique image? These let me cook up something new with just a text prompt, delivering custom visuals for my posts.
- InVideo / Descript: When I need to turn scripts into video quickly, these tools use AI to help, saving me precious hours with short video content.
- Unsplash: I look here for professional-grade, free photos perfect for all my designs.
Mixing and matching tools based on the project helps me maximize both speed and creativity, and I regularly experiment with new features to keep up with what’s trending.
Challenges Content Creators Face in Graphic Design
Even armed with these tools, content creation comes with a few persistent challenges. Here’s how I usually tackle them:
- Time Pressure: Frequent content means quick turnarounds. Templates and premade resources are life-savers when I’m racing the clock.
- Originality: With everyone tapping into the same sources, blending in is a real risk. Customizing templates and mixing in my original graphics or photos keeps my work distinctive.
- Consistent Quality: It’s easy for quality to slip if I rush. Using a simple style guide prevents mismatched colors or fonts in my posts.
- File Sizes and Formats: Big images slow things down and may not upload smoothly. TinyPNG is my go-to for compressing files without sacrificing clarity.
- Design Overload: Less is often more. If I’m on the fence about something, I trim unnecessary graphics, text, or icons, focusing on the core message.
Regular self-checks and feedback sessions help me spot problems early, so my workflow stays efficient without sacrificing creativity.
Working with Templates
Templates have pulled me out of creative blocks more than once. They’re my springboard when inspiration’s low, but I never leave them untouched. Altering colors, swapping fonts, and mixing in original photos or illustrations are key to keeping my brand unique and memorable.
Making the Most of Limited Resources
Not every creator is working with a big budget—trust me, I’ve been there. I leaned on free plans from Canva and Adobe Express for a long time and made the most of public domain or free stock photo sites. With creativity and careful planning, standout visuals are possible even with barebones resources. As things took off, I reinvested in paid tools one at a time based on real needs.
Advanced Tips for Visual Impact
Once I nailed the basics, these extra moves really took my visuals up a notch:
Experiment with Layers: Using multiple photos, graphics, or text elements as layers adds a sense of depth. Subtle drop shadows or overlapping elements bring things to life.
Play with Negative Space: Instead of cluttering every spot, I intentionally leave blank areas around key parts for a sleek, modern look.
Use Animation Wisely: Simple, purposeful animation—like a bouncing call-to-action or a fading arrow—makes posts pop without overwhelming the viewer. But too many moving parts can be distracting, so I keep it minimal.
Test Designs with Real Users: Feedback is gold. I show early drafts to friends or trusted groups; their fresh eyes catch what I might have missed and can point out if anything feels off or confusing.
Practical Equipment and Setup for Graphic Design Workflows
My hardware helps support my digital workflow. Some set-up basics that make a big difference are:
- A reliable monitor; color accuracy can make or break a design.
- A laptop or desktop with enough memory to keep my tools running smoothly.
- A comfortable mouse or a drawing tablet to help with precision tasks.
- Cloud storage for securely saving and sharing my files.
No need to buy the most expensive gear from day one. I started simple and made upgrades as my projects and skills grew. This natural step-by-step process is way less stressful and more sustainable.
Frequently Asked Questions
How do I learn graphic design if I’ve never done it before?
I began with YouTube tutorials and practiced with Canva’s templates. I’d recreate designs I liked to understand what works, then ask friends for feedback to get better fast—no classes required.
What’s the fastest way to make visuals look more professional?
Stick with a simple color palette, choose just one or two fonts, and don’t cram the space full. Clean, minimal designs almost always look best—even for beginners.
Should all my images be originals, or can I use stock photos too?
I use a mix. When I go with stock photos, I make sure to brand them—add my logo, overlays, or adjustments to set them apart from the originals and avoid that “generic” feel.
Which file formats are best for sharing graphics online?
JPEG is good for photos, PNG works best for graphics with transparent sections or lots of text. But I always check what’s best for each platform before uploading, especially for logos or banners.
Making standout graphics takes patience, a mix of skills, and a readiness to try new things. Whether you’re jumping in for the first time or fine-tuning a brand, these handy basics always guide my process and help my visuals shine.
Check Out Our Most Recent Articles:
- Increasing Engagement To Boost Affiliate Marketing Income
- Scaling Content Production Without Increasing Costs

- Balancing Content Quality And Posting Frequency
- Is The Dreaded Google “Shadow Ban” Real?

- Low Website Traffic Affecting My Google AdSense Earnings
- Best Strategies To Overcome Content Creator Burnout

Wishing You Much Success in Your Graphic Design,
- onlinebenjamins.com
- thebeachangler.com
- thesinnerinthemirror.com
- Facebook: Online Benjamins
- Twitter: @onlinebenjamin1
- Instagram: dotcomdinero
- YouTube: Online Benjamins
Rex
P.S. If you have any questions or are unsure of anything, I am here, and I promise I will get back to you on all of your questions and comments. Just leave them below in the comment section. Follow me on Twitter: @onlinebenjamin1, Instagram: dotcomdinero, and Facebook: Online Benjamins.

Hi,
Thanks for stopping by and congratulations for taking the first steps to building your own online business. I’ve been in business both offline and online since 1997. I would consider it an honor to help you build your business. Father of 3, life long outdoorsman with an education in Genetics and Economics. This site is about cutting through the BS and finding the real opportunities in the online world. I look forward to working with you.