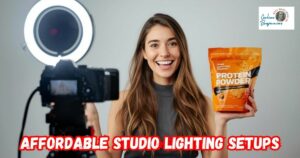
Leveling up your video content doesn’t always mean spending a fortune. Affordable studio lighting kits are a practical way I’ve used to create professional-looking videos from my own workspace. The difference solid lighting can make is huge. No more muddled shadows, dull colors, or oddly lit faces.
QUICK LOOK: – Features to Look for in Affordable Studio Lighting Kits
- Adjustable Color Temperature: I always look for a color range (3200K–5600K covers most needs) to match indoor light, daylight, or to create a specific vibe. Warm tones (lower K numbers) look cozy, while cooler (higher K) means daylight-matching white.
- High CRI (95+): A high CRI means colors, especially skin tones, don’t look weird or flat. This gives accurate reproduction, which is super important if you’re showcasing makeup, crafts, or products.
- Softboxes and Diffusers: Direct LED light can look harsh. Kits with softboxes or diffusers make for softer, more flattering light that reduces harsh shadows. My face always looks better with a softbox than a bare panel.
- Power Flexibility: Some lights work with both AC (wall plug) and batteries. This comes in handy if you want to shoot on the go or don’t want cords in your workspace.
- Portability: Lightweight kits and easy fold-down stands help keep my space clutter-free and make setup super quick.
Whether you’re recording for YouTube, streaming on Twitch, or just want your meetings to look more polished, decent lighting is one upgrade that shows immediate results. Here’s my practical breakdown for creators searching for budget-friendly studio lighting that doesn’t cut corners on quality.
Why Studio Lighting Matters for Video Content
Smart lighting makes a bigger difference than any camera upgrade I’ve tried. A basic camera can look much better under even, diffused lighting. Getting the lighting right helps colors pop, and skin tones look natural. It keeps your video from looking harsh or flat, boosting your overall production value.
This is especially important if you shoot indoors or at night, where room lights tend to create ugly shadows or color casts. Natural daylight has its ups and downs. Windows can give good light, but cloudy weather, the time of day, or the direction your workspace faces mean daylight isn’t always reliable.
I learned quickly that even with a decent camera, my content looked amateurish if the light source wasn’t consistent. Dedicated lighting kits help solve all that, letting me film at any hour and always get the same clean look.
Popular Affordable Studio Lighting Kits
I’ve tested and researched several budget lighting kits that consistently get great reviews from content creators. Here are some standout options that don’t break the bank:
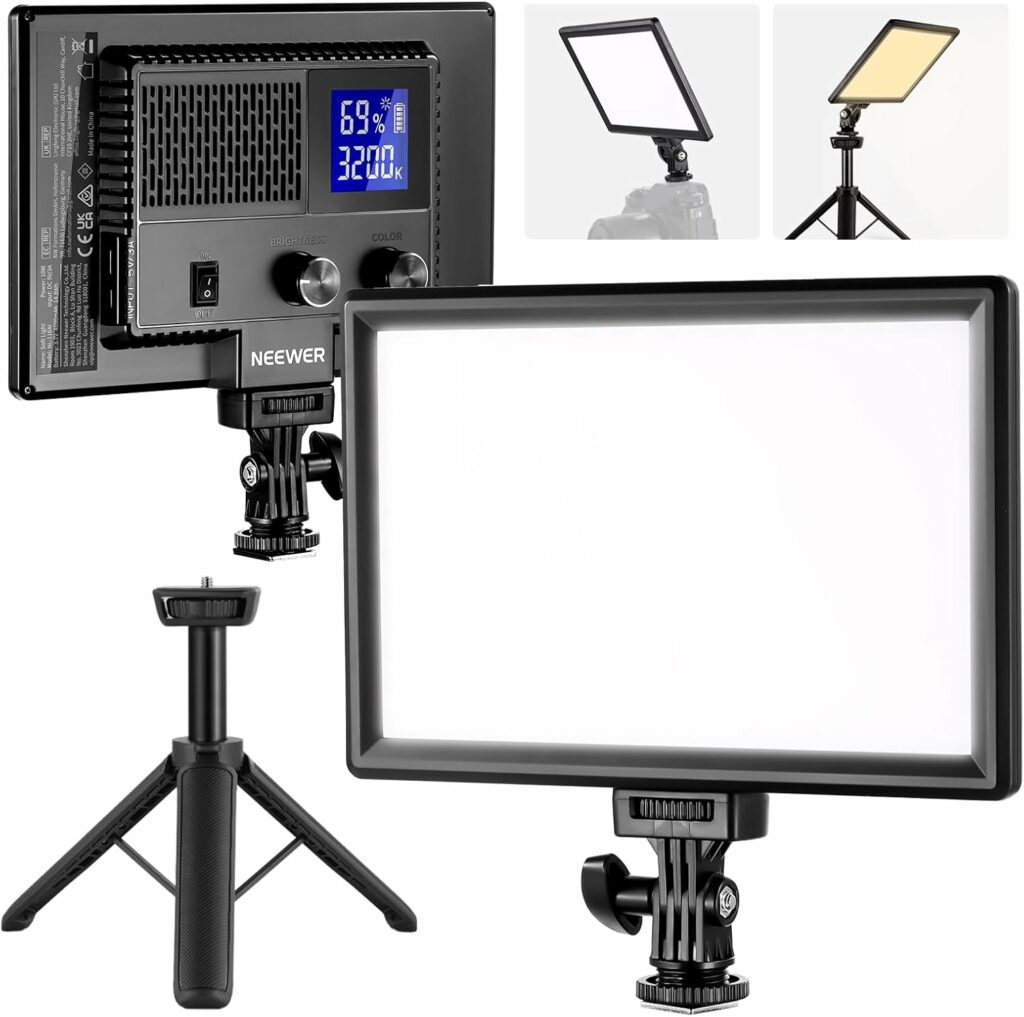
Neewer 9″ LED Video Light Panel
This panel covers the popular 3200K–5600K color temperature range and has a high CRI (color rendering index) of 95+, meaning colors show up the way they should. The desk stand and 9-inch size are good for tight workspaces. Great for single light setups or as a strong fill.
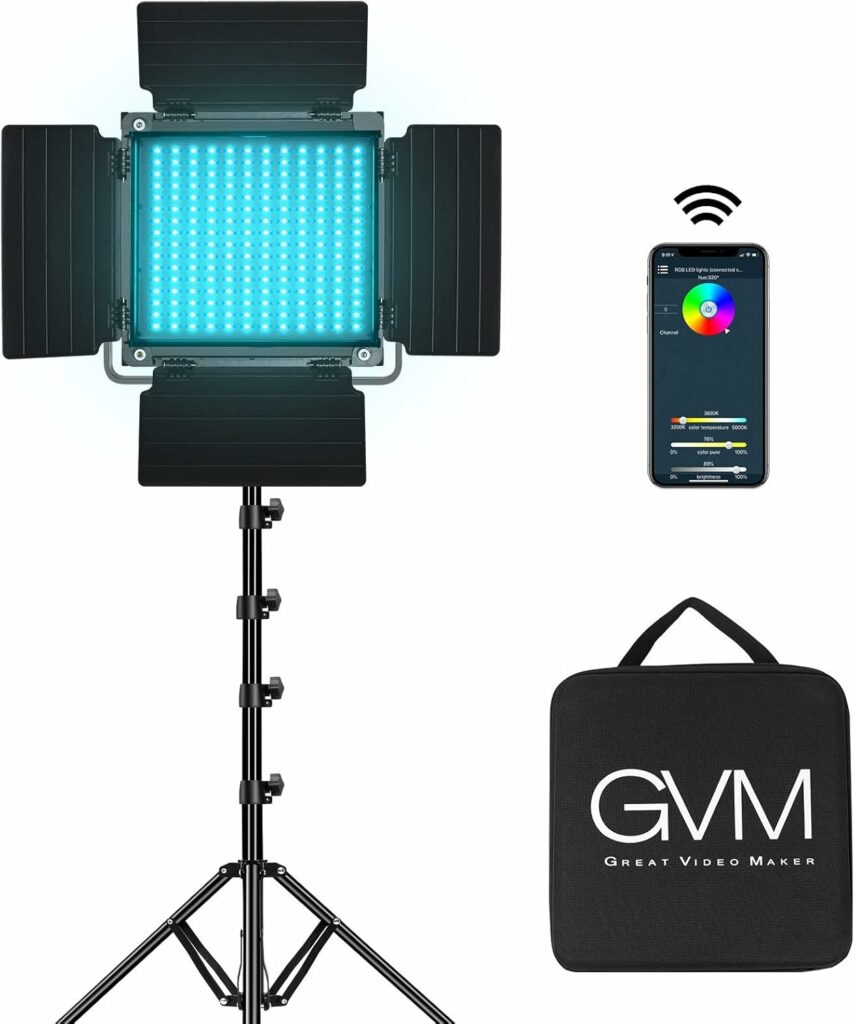
GVM 800D RGB LED Video Light
This is a favorite for creators who want color flexibility. You get full RGB control, meaning you can adjust the light to any color you want using an app. Barndoors let you focus the beam, making it useful for both interviews and creative shots.

VEVOR Softbox Lighting Kit
This classic softbox setup has 16″x16″ diffusers and energy-efficient 45W bulbs. It creates soft, shadow-free light, making it great for talking head videos or product demos. Stands are included; no need to buy extras.
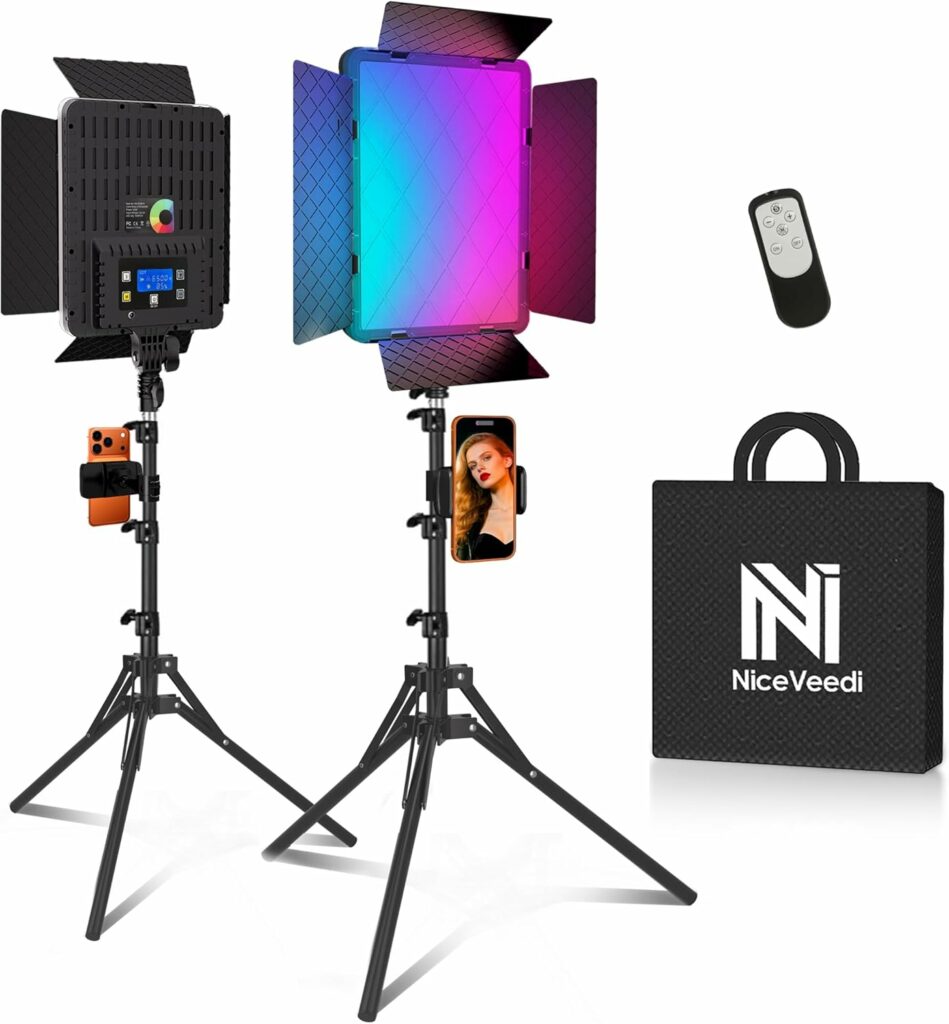
NiceVeedi 2-Pack LED Video Light Kit
The value here is hard to beat. Two adjustable lights, 63-inch tripods, phone holders, and a wide 28006500K color range for all kinds of daylight and indoor looks. Perfect if you want a quick portable setup for facecams or tutorials.
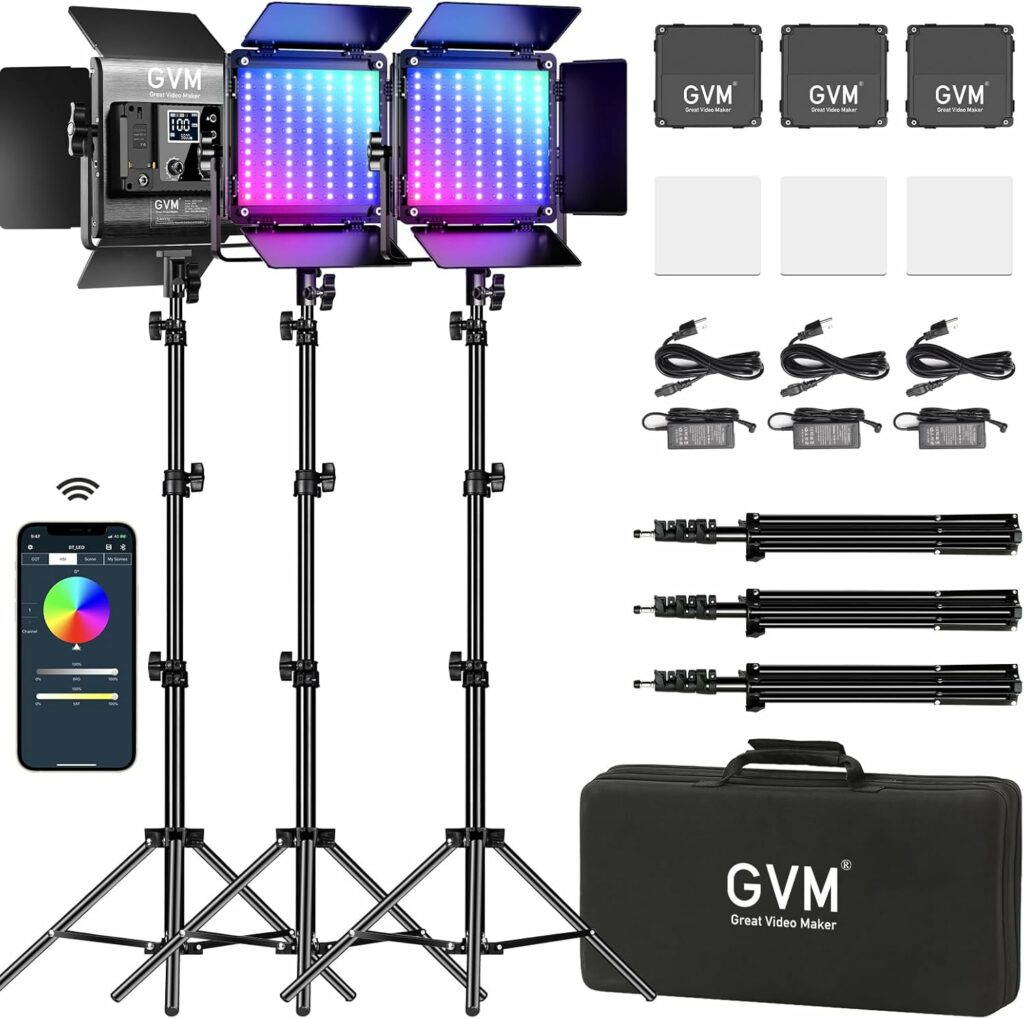
GVM 800D RGB 3 Light Kit
If you’re doing a full three-light setup, this package gives you three adjustable RGB panels, light stands, and a carrying case. Useful for larger spaces or when you want full control over the look of your scene.
Most popular kits include adjustable brightness and portable stands, making them adaptable for both studios and small bedrooms. Each option offers something unique. For example, if you’re mostly streaming from your desk, the Neewer panel’s compact size is ideal.
On the other hand, if you like playing with colored backdrops or mood lighting, the RGB capabilities of the GVM lights make it easy to get creative without extra filters or gels. Reviews for these kits often mention their ease of assembly and long-term reliability, which gives first-time buyers extra assurance.
Key Features That Make a Difference
- Adjustable Color Temperature: I always look for a color range (3200K–5600K covers most needs) to match indoor light, daylight, or to create a specific vibe. Warm tones (lower K numbers) look cozy, while cooler (higher K) means daylight-matching white.
- High CRI (95+): A high CRI means colors, especially skin tones, don’t look weird or flat. This gives accurate reproduction, which is super important if you’re showcasing makeup, crafts, or products.
- Softboxes and Diffusers: Direct LED light can look harsh. Kits with softboxes or diffusers make for softer, more flattering light that reduces harsh shadows. My face always looks better with a softbox than a bare panel.
- Power Flexibility: Some lights work with both AC (wall plug) and batteries. This comes in handy if you want to shoot on the go or don’t want cords in your workspace.
- Portability: Lightweight kits and easy fold-down stands help keep my space clutter-free and make setup super quick.
If you’re filming in a dynamic environment, being able to adjust color temperature and brightness instantly can save a lot of troubleshooting later. Portable kits are especially nice for content creators who need to set up and break down quickly or share a production space with others.
Lighting Basics: Terms and Setups for Beginners
If you’re completely new, a few terms are good to know as you shop:
- Key Light: This is your main source, aimed at you or your subject from a slight angle.
- Fill Light: Usually placed on the opposite side of the key, it softens the natural shadows the key light makes.
- Backlight: Placed behind and above, it helps separate you from the background and gives a sense of depth.
- CRI (Color Rendering Index): Higher numbers (90+) mean colors look more real on camera.
- K (Kelvin): Describes the color of light (like cool blue or warm orange).
Most starter kits have everything you need to get a decent three-point setup or at least a solid primary light. A single big softbox or panel is plenty for desk streaming. Two kits create balanced interviews or product demos, and three let you really finesse the look like a professional studio. Knowing these terms helps you communicate your needs when asking experts or searching online for tips.
Setting Up for Great Results
The best starter tip I have is to keep it simple at first. I usually start with one light at a 45-degree angle to my face or subject, set at about head height. This avoids flat lighting and gives natural shadows. If I have a second light, I place it opposite the main light, but dimmer, to gently fill in shadows.
A third light behind me adds a little glow to my shoulders or hair, which makes me stand out from the background and adds polish. Diffusion makes a big difference, so even if your kit doesn’t come with a dedicated softbox, placing a white shower curtain or sheet in front of an LED panel softens things up in a pinch (just keep it at a safe distance from any heat source).
Avoid aiming lights straight at your face, since angling slightly to the side or up from below the camera avoids hot spots and makes for a more natural look. Experimenting with placement might feel awkward at first, but soon you’ll spot what setup gives you the vibe you want.
What to Think About Before Buying a Lighting Kit
- Space and Portability: Consider if you need a light that sits on your desk, or a kit with a tripod stand for bigger spaces. High ceilings or tight spots need different styles of stands or panel sizes.
- Power Source: If your shooting space doesn’t have many outlets, look for battery-powered options. USB-powered lights are easy to use near computers.
- Color Needs: If you like shooting with different moods or colored backgrounds, RGB lights offer creative freedom.
- Durability: If you move your setup regularly, check reviews for build quality and customer support.
- Budget: Balance spending between lights and accessories. Sometimes an extra diffuser or a better light stand improves results more than another light.
Careful research helps buyers make informed decisions. Reviews and video demos are super useful since they show how the light performs in real-world situations, not just in product photos. Don’t forget to check for warranty details and return policies, so if something doesn’t work out, you’re not stuck.
Frequently Asked Questions
Do I really need special lighting for basic videos?
Even two affordable LED panels or a simple softbox make a huge difference. A small upgrade in lighting boosts the overall look way more than most other upgrades.
Can these lights be used for both video and photography?
Absolutely. Most affordable kits work well for still photos too, especially for product photography, portraits, and indoor shoots.
Are ring lights a good option for beginners?
Ring lights are a handy budget solution, especially for close-up streaming or beauty videos. They work best for tight, centered shots and are easy to set up, but softboxes or panels offer more control for wider shots and three-point lighting.
Can I mix budget lighting with window light?
Yes, just match the color temperature as closely as you can (daylight is around 5600K), and keep your main light source dominant to avoid clashing tones.
Practical Applications for Better Studio Lighting
- YouTube Tutorials: Even lighting across the face helps your instructions stand out, especially with screen recordings or product closeups.
- Zoom Meetings: Good lighting makes online calls more engaging and clear, showing facial expressions and removing unflattering shadows.
- Livestreams: Fans can see your reactions, expressions, and details, which helps build a better connection.
- Product Reviews: Consistent lighting makes colors and fine details easy to see, which viewers appreciate if you’re discussing makeup, tech, or the arts.
Consistent, clean lighting improves everything you film. Little details, like accurate colors and reducing eye strain from glare, add up to a more professional broadcast. Setting up your lighting once and marking your setup can make a huge difference in workflow, letting you get started fast every time you create.
Getting the Most from Affordable Lighting Kits
With a little planning, even budget lighting can make your videos look sharp and professional. Spending a bit of time experimenting with positions, angles, and brightness helps fine-tune your look. Over time, I found that upgrading small things, like adding better diffusers or swapping out light bulbs, provides solid results without a big investment.
For creators starting, the kits above are reliable, flexible, and easy to use. Upgrading your lighting setup is a hands-on way to give a boost to your creative work and keep your content looking its best, no matter your skill level or budget. Remember, the real magic comes from learning what works in your space, so keep trying different setups until you find what gets you the look you want.
Check Out Our Most Recent Articles:
- Managing Multiple Social Media Platforms Efficiently

- Affordable Studio Lighting Kits To Level Up Your Video Content
- Optimizing Blog Posts For GEO To Boost Affiliate Revenue
- Profitable Full-Time Blogging with Diversified Income Streams

- Increasing Engagement To Boost Affiliate Marketing Income

- Scaling Content Production Without Increasing Costs

Wishing You Much Success with Your Video Content,

- onlinebenjamins.com
- thebeachangler.com
- thesinnerinthemirror.com
- diyoutdoorsmen.com
- Facebook: Online Benjamins
- Twitter: @onlinebenjamin1
- Instagram: dotcomdinero
- YouTube: Online Benjamins
Rex
P.S. If you have any questions or are unsure of anything, I am here, and I promise I will get back to you on all of your questions and comments. Just leave them below in the comment section. Follow me on Twitter: @onlinebenjamin1, Instagram: dotcomdinero, and Facebook: Online Benjamins.

Hi,
Thanks for stopping by and congratulations for taking the first steps to building your own online business. I’ve been in business both offline and online since 1997. I would consider it an honor to help you build your business. Father of 3, life long outdoorsman with an education in Genetics and Economics. This site is about cutting through the BS and finding the real opportunities in the online world. I look forward to working with you.